(1) JDK Installation for Mac
http://www.oracle.com/technetwork/java/javase/downloads/index.html
check it's path
/Library/Java/JavaVirtualMachine/
cd ./JDKXXXXXXXX/Contents/Home/
vi ~/.bash_profile
export JAVA_HOME=/Library/Java/JavaVirtualMachine/JDKXXXXXXXX/Contents/Home/
$ java -version
(2) Eclipse Installation
http://www.eclipse.org/downloads/
- No Execution ?
컴퓨터>시스템환경설정>보안및 개인 정보>
확인된 개발자가 등록한 응용프로그램이 아니기 때문에 'eclipse'를 [[[[[[[[[[[[[[[[[[[확인없이 열기]]]]]]]]]]]]]]] you click here
(3) Android SDK Installation
- Help>Install New Software>
Avaliable Software sites>>add
https://dl-ssl.google.com/android/eclipse/
Next Next Next that's it
But it happen to have one issue through this process
------------------------------------------------------------
Click Add and enter the following in Name ADT Plugin and Locationhttps://dl-ssl.google.com/android/eclipse/.
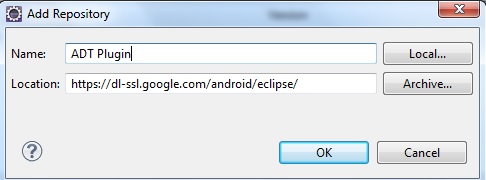 |
| Eclipse Install New Software |
Select the checkbox next to Developer Tools and click Next. After reading and accepting the license agreements, click Finish.
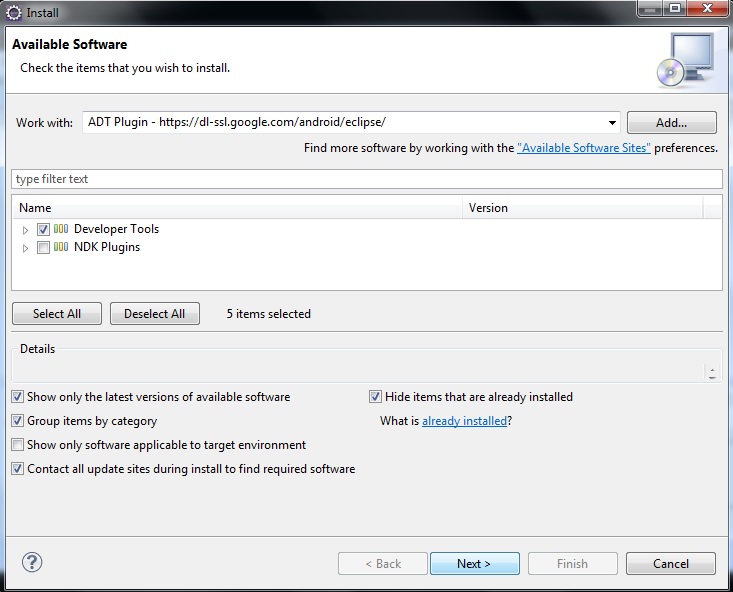 |
| Eclipse Install New Software |
After installation is completed, restart Eclipse. When Eclipse restarted, I was supposed to get a window that said “Welcome to Android Development” where the option Use existing SKDs needed to be selected. Then you need to select the directory to where u downloaded the Android SDK. The window did not appear for me. Instead, I went to Window and selected Preferences.
 |
| Eclipse Preferences |
(before that, you should install android sdk toot kit by http://developer.android.com/sdk/index.html)
you go to http://developer.android.com/sdk/index.html
Other Download Options
SDK Tools Only
If you prefer to use a different IDE or run the tools from the command line or with build scripts, you can instead download the stand-alone Android SDK Tools. These packages provide the basic SDK tools for app development, without an IDE. Also see the SDK tools release notes.
| Platform | Package | Size | SHA-1 Checksum |
|---|---|---|---|
| Windows | installer_r24.4.1-windows.exe(Recommended) | 151659917 bytes | f9b59d72413649d31e633207e31f456443e7ea0b |
| android-sdk_r24.4.1-windows.zip | 199701062 bytes | 66b6a6433053c152b22bf8cab19c0f3fef4eba49 | |
| android-sdk_r24.4.1-macosx.zip | 102781947 bytes | 85a9cccb0b1f9e6f1f616335c5f07107553840cd | |
| Linux | android-sdk_r24.4.1-linux.tgz | 326412652 bytes | 725bb360f0f7d04eaccff5a2d57abdd49061326d |
All Android Studio Packages
You Mac?, you choose android-sdk_r24.4.1-macosx.zip
and unzip that
and follow below process
-----------------------------------------------------------------------------------------------
Afterwards, I clicked Browse and selected the location of the Android SDK directory.
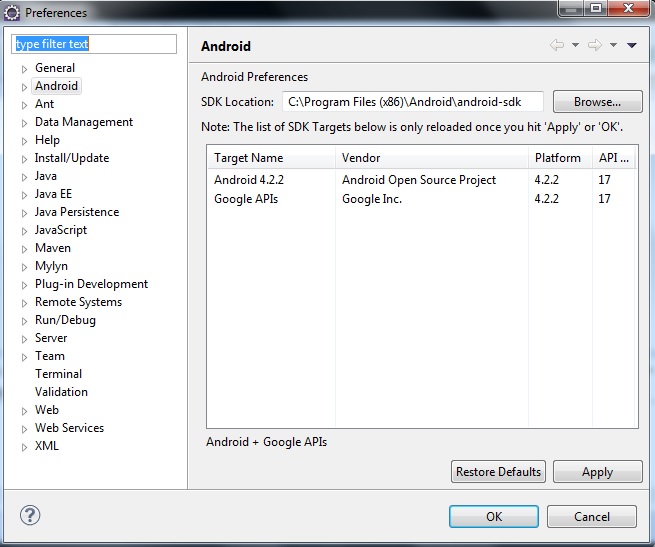 |
| Eclipse Android Preferences |
Then I executed the Android SDK Manager which can be found in the Android SDK directory. The SDK Manager provides all the packages to add to the Android SDK. Select the checkboxes Tools folder, first Android version folder, and Android Support Library found on the Extras folder.
 |
| Android SDK Manager |
After selecting all the necessary packages, click Install. When the installation is completed, I will be ready to build my first app!
In case you get stuck in one of the installation steps, here is a very nice tutorial on the installation of the ADT Bundle:
'모바일개발(Mobile Dev) > 안드로이드개발(Android)' 카테고리의 다른 글
| Android LayoutInflater Usage (0) | 2016.05.06 |
|---|---|
| Android Menu Vs Action Bar (0) | 2016.05.05 |
| android:style/Theme.Dialog java.lang.IllegalStateException: You need to use a Theme.AppCompat theme (or descendat) with this activity (0) | 2016.04.05 |
| Emulator cpu acceleration status : Hax kernel module is not installed (0) | 2016.03.16 |
| Android with USB Device 디버깅 사용하기 (0) | 2016.02.07 |