How to build a game like Flappy Bird with Xcode and SpriteKit
Update Feb. 27th: Fixed a small glitch in the tutorial that DylanYasen pointed out, thanks! (No code change.)
Update Apr. 9th: Sorry, I currently don’t have time to update the tutorial. In the meantime, take a look what reader Daniel Bocksteger built with the learnings from this tutorial: Coin Catcher.
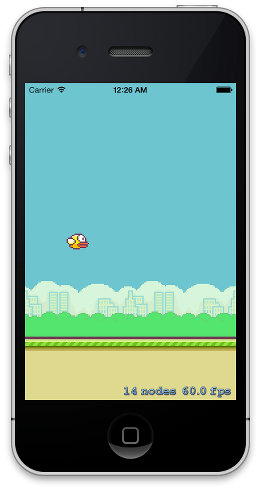
When I heard about Flappy Bird for the first time, the hype was already in its final phase: developer Dong Nguyen had decided to pull the app from the stores in “22 hours from now“. Apart from overreacting users and an allegedly daily advertising revenue of up to 50,000 US$, the simple game mechanics were something that caught my attention. The concept of clicking/tapping to keep the player on track wasn’t really an innovation in itself, but given the hype it caused, it was certainly worth a closer look. As a Sunday evening challenge, I tried to reproduce the game mechanics and ended up with less than 200 lines of code.
Graphic assets
Since the app was already removed from the stores when I started working on the clone, I had to rely on screenshots and videos of the original game to reproduce the individual sprites. I used The Gimp to produce the bird (two simple frames for animation), the pipes (upper and lower version), the distant background and the ground.

Note that the created files are a little too small for an iPhone display. Therefore, in the course of this tutorial, you’ll see that I simply doubled the size by scaling every sprite by a factor of 2. In order to maintain the 8 bit retro look I changed the filtering mode of the textures from SKTextureFilteringLinear (standard) toSKTextureFilteringNearest.
You can download the created files with the final project.
Xcode project setup
iOS 7 comes with a great new framework called Sprite Kit. It hides lots of the iOS UI development details game programmers are not necessarily familiar with (outlets anyone?) and builds upon a basic game infrastructure they are are more used to (e.g. rendering loop and scene graph). For all iOS developers, focussing on the game mechanics becomes a breeze.
When Xcode starts, simply select “Create a new Xcode project” from the splash screen.

From the available project templates, select “SpriteKit Game”.
![]()
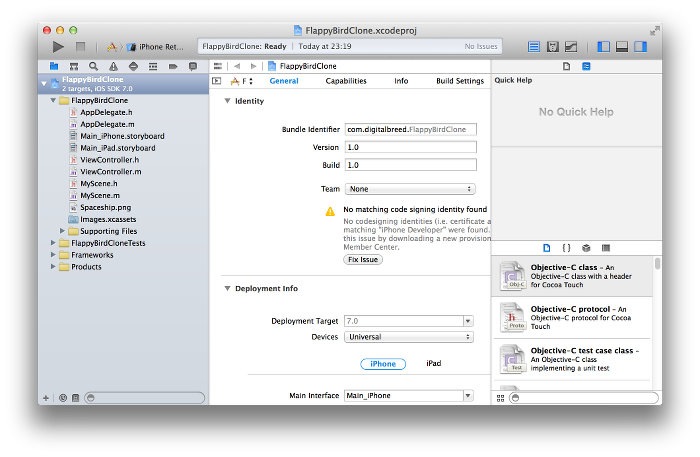
Now enter some project details. You can change them later if you need to.

Select a place to store the project files. I usually create a new subfolder in my Documents folder.
Finally, the project is created and we’re ready for development.
The bird
The template project comes with some sample code and assets that need to be removed. Delete the Spaceship.png graphic from the project and add the Bird1.png andBird2.png files instead. Also remove the existing code in the initWithSize andtouchesBegan methods of MyScene.m.
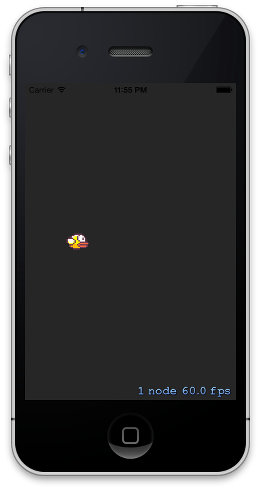
In initWithSize, create the bird sprite and add it to the scene. To access the bird easily from other class methods, we declare it as an ivar.
1 2 3 4 5 6 7 8 9 10 11 12 13 14 15 16 17 18 19 20 21 22 23 24 25 26 27 28 29 30 31 32 33 34 | #import "MyScene.h"@interface MyScene () { SKSpriteNode* _bird;}@end@implementation MyScene-(id)initWithSize:(CGSize)size { if (self = [super initWithSize:size]) { /* Setup your scene here */ SKTexture* birdTexture1 = [SKTexture textureWithImageNamed:@"Bird1"]; birdTexture1.filteringMode = SKTextureFilteringNearest; _bird = [SKSpriteNode spriteNodeWithTexture:birdTexture1]; [_bird setScale:2.0]; _bird.position = CGPointMake(self.frame.size.width / 4, CGRectGetMidY(self.frame)); [self addChild:_bird]; } return self;}-(void)touchesBegan:(NSSet *)touches withEvent:(UIEvent *)event { /* Called when a touch begins */}-(void)update:(CFTimeInterval)currentTime { /* Called before each frame is rendered */}@end |
One important thing to remember is that the SpriteKit’s scene coordinate system has it’s origin at the bottom left point and the positive y- and x-axes extend to the top and right of the screen. A sprite’s default anchor point is always the center. Using the code above, the bird is placed on the vertical center and end of the horizontal first quarter of the screen.
Hooray, we’re nearly there! It won’t get much harder than that, believe me.
Animating the bird
Animating is pretty easy thanks to SpriteKit Actions. We simply create a sequence of texture-changes and loop them endlessly with a little delay in order to produce the illusion of flapping wings. I believe that the original game used some more frames, but we’ll go with two for the sake of simplicity.
We’ll have to load the second bird sprite, too, produce an SKAction to animate them, and attach this animation to the bird.
1 2 3 4 5 6 7 8 9 10 11 | SKTexture* birdTexture1 = [SKTexture textureWithImageNamed:@"Bird1"];birdTexture1.filteringMode = SKTextureFilteringNearest;SKTexture* birdTexture2 = [SKTexture textureWithImageNamed:@"Bird2"];birdTexture2.filteringMode = SKTextureFilteringNearest; SKAction* flap = [SKAction repeatActionForever:[SKAction animateWithTextures:@[birdTexture1, birdTexture2] timePerFrame:0.2]]; _bird = [SKSpriteNode spriteNodeWithTexture:birdTexture1];[_bird setScale:2.0];_bird.position = CGPointMake(self.frame.size.width / 4, CGRectGetMidY(self.frame));[_bird runAction:flap]; |
This results in a simple animation like this:
Adding ground and background
Most of the screen background is a bright blue sky. Let’s fill the screen accordingly. We store the sky color in an ivar for later…
1 2 3 4 5 6 7 8 9 10 11 12 13 14 | @interface MyScene () { SKSpriteNode* _bird; SKColor* _skyColor;}@end@implementation MyScene-(id)initWithSize:(CGSize)size { if (self = [super initWithSize:size]) { /* Setup your scene here */ _skyColor = [SKColor colorWithRed:113.0/255.0 green:197.0/255.0 blue:207.0/255.0 alpha:1.0]; [self setBackgroundColor:_skyColor]; |
The background and ground sprites are repeating patterns. After adding Skyline.png andGround.png to the project, we setup the textures first and then fill the full screen width with the sprites.
1 2 3 4 5 6 7 8 9 10 11 12 13 14 15 16 17 18 19 20 21 22 23 24 | // Create ground SKTexture* groundTexture = [SKTexture textureWithImageNamed:@"Ground"];groundTexture.filteringMode = SKTextureFilteringNearest;for( int i = 0; i < 2 + self.frame.size.width / ( groundTexture.size.width * 2 ); ++i ) { SKSpriteNode* sprite = [SKSpriteNode spriteNodeWithTexture:groundTexture]; [sprite setScale:2.0]; sprite.position = CGPointMake(i * sprite.size.width, sprite.size.height / 2); [self addChild:sprite];} // Create skyline SKTexture* skylineTexture = [SKTexture textureWithImageNamed:@"Skyline"];skylineTexture.filteringMode = SKTextureFilteringNearest; for( int i = 0; i < 2 + self.frame.size.width / ( skylineTexture.size.width * 2 ); ++i ) { SKSpriteNode* sprite = [SKSpriteNode spriteNodeWithTexture:skylineTexture]; [sprite setScale:2.0]; sprite.zPosition = -20; sprite.position = CGPointMake(i * sprite.size.width, sprite.size.height / 2 + groundTexture.size.height * 2); [self addChild:sprite];} |
This leads to the following static scene.
You may have noticed that I created one more tile than necessary. This is required for the animation: We can create the illusion of movement by simply moving each sprite to the left for a full width and then resetting it to the original position. When the tiles wander to the left, a gap opens at the right edge of the screen. We use the extra tile to fill that gap.
1 2 3 4 5 6 7 8 9 10 11 12 13 14 15 16 17 18 19 20 21 22 23 24 25 26 27 28 29 30 31 32 33 34 35 | // Create ground SKTexture* groundTexture = [SKTexture textureWithImageNamed:@"Ground"];groundTexture.filteringMode = SKTextureFilteringNearest; SKAction* moveGroundSprite = [SKAction moveByX:-groundTexture.size.width*2 y:0 duration:0.02 * groundTexture.size.width*2];SKAction* resetGroundSprite = [SKAction moveByX:groundTexture.size.width*2 y:0 duration:0];SKAction* moveGroundSpritesForever = [SKAction repeatActionForever:[SKAction sequence:@[moveGroundSprite, resetGroundSprite]]];for( int i = 0; i < 2 + self.frame.size.width / ( groundTexture.size.width * 2 ); ++i ) { // Create the sprite SKSpriteNode* sprite = [SKSpriteNode spriteNodeWithTexture:groundTexture]; [sprite setScale:2.0]; sprite.position = CGPointMake(i * sprite.size.width, sprite.size.height / 2); [sprite runAction:moveGroundSpritesForever]; [self addChild:sprite];} // Create skyline SKTexture* skylineTexture = [SKTexture textureWithImageNamed:@"Skyline"];skylineTexture.filteringMode = SKTextureFilteringNearest; SKAction* moveSkylineSprite = [SKAction moveByX:-skylineTexture.size.width*2 y:0 duration:0.1 * skylineTexture.size.width*2];SKAction* resetSkylineSprite = [SKAction moveByX:skylineTexture.size.width*2 y:0 duration:0];SKAction* moveSkylineSpritesForever = [SKAction repeatActionForever:[SKAction sequence:@[moveSkylineSprite, resetSkylineSprite]]]; for( int i = 0; i < 2 + self.frame.size.width / ( skylineTexture.size.width * 2 ); ++i ) { SKSpriteNode* sprite = [SKSpriteNode spriteNodeWithTexture:skylineTexture]; [sprite setScale:2.0]; sprite.zPosition = -20; sprite.position = CGPointMake(i * sprite.size.width, sprite.size.height / 2 + groundTexture.size.height * 2); [sprite runAction:moveSkylineSpritesForever]; [self addChild:sprite];} |
Two layers of the scene are scrolling with different pace (speed scale factors 0.1 and 0.02 above), leading to an illusion of depth. This effect has been used in 2D video games for ages and is called parallax scrolling.
Let’s add some physics
Until now, everything in the scene is just fake. The bird doesn’t even move. But we can easily enable the SpriteKit physics engine in order to add some realistic movement to the scene.
SpriteKit allows to attach a physics body to every scene node. The physics body has certain properties like mass, density, friction,… and it can interact with other physics-enabled entities in the scene. Once a physics body is created, the owner node is controlled by physics.
Let’s start with the bird. We will represent it’s physical shape by a circle.
1 2 3 4 5 6 7 8 9 10 | _bird = [SKSpriteNode spriteNodeWithTexture:birdTexture1];[_bird setScale:2.0];_bird.position = CGPointMake(self.frame.size.width / 4, CGRectGetMidY(self.frame));[_bird runAction:flap];_bird.physicsBody = [SKPhysicsBody bodyWithCircleOfRadius:_bird.size.height / 2];_bird.physicsBody.dynamic = YES;_bird.physicsBody.allowsRotation = NO;[self addChild:_bird]; |
When we start our clone now, we’ll see the bird falling straight down – and out of the screen. In order to avoid that, we will have to create a physics body for the ground as well. We could attach it to each of the ground tiles, but remember that they’re continuously moving left and then resetting their position. This could lead to some strange effects once the bird collides with such a ground tile. So instead, we can simply create an empty node with a rectangular physics body which spans the full ground.
Add this below the creation of the ground sprites:
1 2 3 4 5 6 7 | // Create ground physics containerSKNode* dummy = [SKNode node];dummy.position = CGPointMake(0, groundTexture.size.height);dummy.physicsBody = [SKPhysicsBody bodyWithRectangleOfSize:CGSizeMake(self.frame.size.width, groundTexture.size.height * 2)];dummy.physicsBody.dynamic = NO;[self addChild:dummy]; |
Note that the bird has property dynamic set to YES, while the ground (and all other “static” entities) have dynamic set to NO. This is because that only the bird is affected by interactions with the physic world. The remaining entities are under our control and won’t change their position or rotation e.g. due to a collision.
With these changes in place, you’ll see our little bird falling to the ground.
The bird is falling a little too fast for my taste. We have multiple options to control this behavior, let’s try the easiest and most obvious one first: we’ll change the world’s gravity!
At the beginning of the scene setup, simply add:
1 | self.physicsWorld.gravity = CGVectorMake( 0.0, -5.0 ); |
This will reduce the gravity from an authentic -9.8m/s^2 to only -5m/s^2, making the bird falling slower.
In order to let the bird raise on a click/touch, we will apply a small directed impulse to the bird’s physics body. You wouldn’t believe how easy this is with SpriteKit. Just add one line to the touchesBegan method:
1 2 3 4 | -(void)touchesBegan:(NSSet *)touches withEvent:(UIEvent *)event { /* Called when a touch begins */ [_bird.physicsBody applyImpulse:CGVectorMake(0, 8)];} |
The result should look like that:

Blog reader Sascha suggests to reset the bird’s velocity before the new impulse is applied. This avoids that the impulses accumulate per touch/click. Blog reader Nico suggests to reduce the impulse a little in that case, so the touchesBegan method now looks like that:
1 2 3 4 5 | -(void)touchesBegan:(NSSet *)touches withEvent:(UIEvent *)event { /* Called when a touch begins */ _bird.physicsBody.velocity = CGVectorMake(0, 0); [_bird.physicsBody applyImpulse:CGVectorMake(0, 4)];} |
I strongly encourage you to experiment with these values.
While we’re at it, we can also change the bird’s rotation depending on it’s velocity. If it’s flying upward the beak should point to the top right; if downward, to the bottom right. This can easily happen on a per-frame basis in the update:currentTime method, which was unused up to now.
1 2 3 4 5 6 7 8 9 10 11 12 13 14 | CGFloat clamp(CGFloat min, CGFloat max, CGFloat value) { if( value > max ) { return max; } else if( value < min ) { return min; } else { return value; }}-(void)update:(CFTimeInterval)currentTime { /* Called before each frame is rendered */ _bird.zRotation = clamp( -1, 0.5, _bird.physicsBody.velocity.dy * ( _bird.physicsBody.velocity.dy < 0 ? 0.003 : 0.001 ) );} |
As you can see, I use the bird’s physics body velocity property which is maintained by the physics simulation. I added a little helper function clamp which avoids too large values in either direction. Note that the minimum and maximum values (-1, 0.5) are radians.
Pipes
The last game entity are the pipes which are moving in to the scene from the right and need to be avoided. As before, the pipes are textured SKSpriteNodes, they will be animated using SKActions and they’ll get a physics body attached for collision.
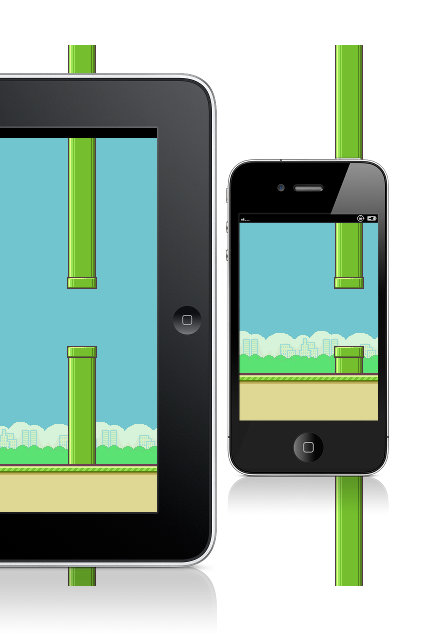
Add the two pipe graphics Pipe1.png and Pipe2.png to the project. From a graphical perspective, the pipes are a special entity. While the ground and skyline are always attached to the bottom edge of the screen and the bird always has the same dimensions, the top pipe has to extend from the top edge and the bottom pipe has to extend from the bottom edge. While this could be solved programmatically with the benefit of saving some texture space, I decided to use very high textures instead and not worry about display size anymore.
While pipes consist of two SKSpriteNodes, I wrap both nodes into one empty SKNode as a parent. This has the advantage that it is sufficient to position the parent node in the world, while the two childs are positioned relatively to their parent node, so I only need to worry about their vertical position.
The distance between the upper and lower pipe is arbitrary, I chose 100 points.
1 2 3 4 5 | @implementation MyScenestatic NSInteger const kVerticalPipeGap = 100;-(id)initWithSize:(CGSize)size { |
A pair of pipes is created outside of the right screen edge. The lower pipe’s position is chosen randomly somewhere in the lower third of the screen. The upper pipe is added accordingly, considering the defined gap size. The zPosition for the pipes is chosen so that they always are rendered behind the ground.
1 2 3 4 5 6 7 8 9 10 11 12 13 14 15 16 17 18 19 20 21 22 23 24 25 26 27 28 29 30 31 | // Create pipesSKTexture* _pipeTexture1 = [SKTexture textureWithImageNamed:@"Pipe1"];_pipeTexture1.filteringMode = SKTextureFilteringNearest;SKTexture* _pipeTexture2 = [SKTexture textureWithImageNamed:@"Pipe2"];_pipeTexture2.filteringMode = SKTextureFilteringNearest;SKNode* pipePair = [SKNode node];pipePair.position = CGPointMake( self.frame.size.width + _pipeTexture1.size.width * 2, 0 );pipePair.zPosition = -10;CGFloat y = arc4random() % (NSInteger)( self.frame.size.height / 3 );SKSpriteNode* pipe1 = [SKSpriteNode spriteNodeWithTexture:_pipeTexture1];[pipe1 setScale:2];pipe1.position = CGPointMake( 0, y );pipe1.physicsBody = [SKPhysicsBody bodyWithRectangleOfSize:pipe1.size];pipe1.physicsBody.dynamic = NO;[pipePair addChild:pipe1];SKSpriteNode* pipe2 = [SKSpriteNode spriteNodeWithTexture:_pipeTexture2];[pipe2 setScale:2];pipe2.position = CGPointMake( 0, y + pipe1.size.height + kVerticalPipeGap );pipe2.physicsBody = [SKPhysicsBody bodyWithRectangleOfSize:pipe2.size];pipe2.physicsBody.dynamic = NO;[pipePair addChild:pipe2];SKAction* movePipes = [SKAction repeatActionForever:[SKAction moveByX:-1 y:0 duration:0.02]];[pipePair runAction:movePipes];[self addChild:pipePair]; |
The bird collides with the moving pipe and is pushed out of the screen.
We want these pipes to appear regularly. We will use SKActions again, but this time, in a little different way. Instead of moving the pipes and resetting their position, we will spawn new pipes regularly. We will move the spawn logic into a separate method. For that purpose, we need to store textures and the SKAction to move the pipes in new ivars:
1 2 3 4 5 6 7 8 | @interface MyScene () { SKSpriteNode* _bird; SKColor* _skyColor; SKTexture* _pipeTexture1; SKTexture* _pipeTexture2; SKAction* _moveAndRemovePipes;}@end |
The _moveAndRemovePipes action is created right after the pipe texture loading like so:
1 2 3 4 | CGFloat distanceToMove = self.frame.size.width + 2 * _pipeTexture1.size.width;SKAction* movePipes = [SKAction moveByX:-distanceToMove y:0 duration:0.01 * distanceToMove];SKAction* removePipes = [SKAction removeFromParent];_movePipesAndRemove = [SKAction sequence:@[movePipes, removePipes]]; |
This will move the pipes by a full screen width plus two times their texture width to make sure that the pipes are out of sight. Then, they are removed from the scene.
The spawn method is responsible for creating new pipes:
1 2 3 4 5 6 7 8 9 10 11 12 13 14 15 16 17 18 19 20 21 22 23 24 25 | -(void)spawnPipes { SKNode* pipePair = [SKNode node]; pipePair.position = CGPointMake( self.frame.size.width + _pipeTexture1.size.width, 0 ); pipePair.zPosition = -10; CGFloat y = arc4random() % (NSInteger)( self.frame.size.height / 3 ); SKSpriteNode* pipe1 = [SKSpriteNode spriteNodeWithTexture:_pipeTexture1]; [pipe1 setScale:2]; pipe1.position = CGPointMake( 0, y ); pipe1.physicsBody = [SKPhysicsBody bodyWithRectangleOfSize:pipe1.size]; pipe1.physicsBody.dynamic = NO; [pipePair addChild:pipe1]; SKSpriteNode* pipe2 = [SKSpriteNode spriteNodeWithTexture:_pipeTexture2]; [pipe2 setScale:2]; pipe2.position = CGPointMake( 0, y + pipe1.size.height + kVerticalPipeGap ); pipe2.physicsBody = [SKPhysicsBody bodyWithRectangleOfSize:pipe2.size]; pipe2.physicsBody.dynamic = NO; [pipePair addChild:pipe2]; [pipePair runAction:_movePipesAndRemove]; [self addChild:pipePair];} |
Finally, we need to ensure that the spawnPipes method is called regularly to produce new pipes and attach the animation to it. This happens with an SKAction which is directly attached to the SKScene.
1 2 3 4 5 | SKAction* spawn = [SKAction performSelector:@selector(spawnPipes) onTarget:self];SKAction* delay = [SKAction waitForDuration:2.0];SKAction* spawnThenDelay = [SKAction sequence:@[spawn, delay]];SKAction* spawnThenDelayForever = [SKAction repeatActionForever:spawnThenDelay];[self runAction:spawnThenDelayForever]; |
This action calls the spawnPipes method, then pauses for two seconds, then repeats.
Now we’ve got beautiful repeating pipes.
Collision detection and response
The game is over when the bird hits a pipe, so detecting a hit is our next challenge. SpriteKit provides a dedicated delegate for collision detection, SKPhysicsContactDelegate, which allows to respond whenever two physics entities are in contact. We will implement the delegate in our scene and set the physics world delegate to the scene.
Moreover, we need to setup some categories for the different types of entities in the scene. Right now, all entities collide with each other and we would receive notifications for all these contacts because of the default setup: all relevant properties – discussed below – have value 0. We will use the categories to configure the contact testing in more detail.
1 2 3 4 5 6 7 8 9 10 11 12 13 14 15 16 17 18 19 20 21 22 23 | @interface MyScene () <SKPhysicsContactDelegate> { SKSpriteNode* _bird; SKColor* _skyColor; SKTexture* _pipeTexture1; SKTexture* _pipeTexture2; SKAction* _movePipesAndRemove;}@end@implementation MyScenestatic const uint32_t birdCategory = 1 << 0;static const uint32_t worldCategory = 1 << 1;static const uint32_t pipeCategory = 1 << 2;static NSInteger const kVerticalPipeGap = 100;-(id)initWithSize:(CGSize)size { if (self = [super initWithSize:size]) { /* Setup your scene here */ self.physicsWorld.gravity = CGVectorMake( 0.0, -5.0 ); self.physicsWorld.contactDelegate = self; |
We can use the categories to configure which entities can collide with each other and for which types of collisions we want to get notified. This is useful for two reasons: 1. the physics engine doesn’t need to test for collisions between e.g. the pipes and the ground (which saves some performance) and 2. we don’t require notifications for all possible types of collisions.
SpriteKit provides three physics body properties for that purpose: categoryBitMask says to which categories an entity belongs, collisionBitMask says which categories can collide with the entity and contactTestBitMask says which contacts lead to a notification. Note the separation of collision (actual interaction with the physics world) and contact (sole collision testing without any reaction in the physics world)! The latter two fields allow to produce three different scenarios: 1. contacts between entities are ignored, 2. contacts are notified but nothing happens in the physics simulation, 3. contacts are notified and applied to the physics world.
We will setup the bird as follows:
1 2 3 | _bird.physicsBody.categoryBitMask = birdCategory;_bird.physicsBody.collisionBitMask = worldCategory | pipeCategory;_bird.physicsBody.contactTestBitMask = worldCategory | pipeCategory; |
This means that the bird can collide with entities of the worldCategory andpipeCategory and that we would get notified for both of them. (You may wonder why we separate the categories for world and pipes – we could use one category for both of them. I’ll clarify later in this tutorial.)
The definition for the ground entity is a little easier. We only need to assign the category but do not request any collision notification/reaction.
1 | dummy.physicsBody.categoryBitMask = worldCategory; |
1 2 | pipe1.physicsBody.categoryBitMask = pipeCategory;pipe1.physicsBody.contactTestBitMask = birdCategory; |
1 2 | pipe2.physicsBody.categoryBitMask = pipeCategory;pipe2.physicsBody.contactTestBitMask = birdCategory; |
For the player nothing has changed: the bird still collides with the world. But the internals are now configured in a more sensible way.
Now we need to implement the contact notification method as required by the delegate. In order to visualize the collision, we will flash the background a little. That’s why we stored the sky color at the beginning of the tutorial!
1 2 3 4 5 6 7 8 9 | - (void)didBeginContact:(SKPhysicsContact *)contact { // Flash background if contact is detected [self removeActionForKey:@"flash"]; [self runAction:[SKAction sequence:@[[SKAction repeatAction:[SKAction sequence:@[[SKAction runBlock:^{ self.backgroundColor = [SKColor redColor]; }], [SKAction waitForDuration:0.05], [SKAction runBlock:^{ self.backgroundColor = _skyColor; }], [SKAction waitForDuration:0.05]]] count:4]]] withKey:@"flash"];} |
We’re using a symbolic identifier for the SKAction here for the first time. That way, we can remove any previously created SKAction with the same name.
When you start the game now, you’ll see the background flashing red in case of a collision.
Animation stop
In order to stop the world movement and disable player control of the bird in case of a collision, we can make use of the speed property of the SKNodes. Setting the speed to 0 means that all running SKActions are paused. In order to avoid setting the speedproperty on every individual moving entity in the scene, we create a dummy parent node called _moving which holds all moving entities: the pipes, the background, the ground.
Once again we use an ivar to make it accessible from all methods.
1 2 3 4 5 6 7 8 9 | @interface MyScene () <SKPhysicsContactDelegate> { SKSpriteNode* _bird; SKColor* _skyColor; SKTexture* _pipeTexture1; SKTexture* _pipeTexture2; SKAction* _movePipesAndRemove; SKNode* _moving;}@end |
The entity is created at the beginning and added to the scene. All moving entities are added to this parent node.
1 2 3 4 5 6 7 8 9 10 11 12 13 14 15 16 17 18 19 20 21 22 23 24 25 26 27 28 | _skyColor = [SKColor colorWithRed:113.0/255.0 green:197.0/255.0 blue:207.0/255.0 alpha:1.0];[self setBackgroundColor:_skyColor];_moving = [SKNode node];[self addChild:_moving];SKTexture* birdTexture1 = [SKTexture textureWithImageNamed:@"Bird1"];birdTexture1.filteringMode = SKTextureFilteringNearest;...// Create ground...for( int i = 0; i < 2 + self.frame.size.width / ( groundTexture.size.width * 2 ); ++i ) { ... [_moving addChild:sprite];}// Create skyline...for( int i = 0; i < 2 + self.frame.size.width / ( skylineTexture.size.width * 2 ); ++i ) { ... [_moving addChild:sprite];} |
This affects also the pipe creation:
1 2 3 4 5 6 | -(void)spawnPipes { ... [pipePair runAction:_movePipesAndRemove]; [_moving addChild:pipePair];} |
Now that we have all moving parts except the bird under one parent node. In order to stop animations, we can set the speed of _moving to 0 in case of contact. The parent’s speed is applied to all child nodes. We also want to happen this exactly once. We’re not interested in any further contacts once the animation has halted, so we wrap the whole method in a corresponding if.
1 2 3 4 5 6 7 | - (void)didBeginContact:(SKPhysicsContact *)contact { if( _moving.speed > 0 ) { _moving.speed = 0; // Flash background if contact is detected ... } |
You might have noticed that we did not add the bird to the _moving node. This is because we still want it to move and animate. We just need to retain player control from the bird by allowing touches only with _moving.speed > 0.
1 2 3 4 5 6 7 | -(void)touchesBegan:(NSSet *)touches withEvent:(UIEvent *)event { /* Called when a touch begins */ if( _moving.speed > 0 ) { _bird.physicsBody.velocity = CGVectorMake(0, 0); [_bird.physicsBody applyImpulse:CGVectorMake(0, 4)]; }} |
Restart
Before we can restart the game, we need some way to reset the entire scene: the bird has to be moved to its initial position, its physics properties have to be reset, existing pipes have to be removed and the animation has to be restarted. Most importantly, this shouldn’t start immediately after a collision but after a little delay and an explicit user click/touch.
Let’s keep track when the user is allowed to restart the game in a new ivar _canRestart.
1 2 3 4 5 6 7 8 9 10 | @interface MyScene () <SKPhysicsContactDelegate> { SKSpriteNode* _bird; SKColor* _skyColor; SKTexture* _pipeTexture1; SKTexture* _pipeTexture2; SKAction* _movePipesAndRemove; SKNode* _moving; BOOL _canRestart;}@end |
We will initialize this flag to NO because it’s not relevant during a running game.
1 2 3 4 5 6 7 | -(id)initWithSize:(CGSize)size { if (self = [super initWithSize:size]) { /* Setup your scene here */ _canRestart = NO; self.physicsWorld.gravity = CGVectorMake( 0.0, -5.0 ); |
But we’ll change the flag to YES after a collision and after the background-flash-animation has finished (that should be enough game-over-drama for the sake of this tutorial). For that purpose, we can use another kind of SKAction, one that supports block execution. We simply append it to the flash-animation.
1 2 3 4 5 6 7 8 9 10 11 12 13 | - (void)didBeginContact:(SKPhysicsContact *)contact { _moving.speed = 0; // Flash background if contact is detected [self removeActionForKey:@"flash"]; [self runAction:[SKAction sequence:@[[SKAction repeatAction:[SKAction sequence:@[[SKAction runBlock:^{ self.backgroundColor = [SKColor redColor]; }], [SKAction waitForDuration:0.05], [SKAction runBlock:^{ self.backgroundColor = _skyColor; }], [SKAction waitForDuration:0.05]]] count:4], [SKAction runBlock:^{ _canRestart = YES; }]]] withKey:@"flash"];} |
Now, if the game finished due to a collision and the user is allowed to restart, we can simply make use of the flag in the touchesBegan method and reset the scene after click/touch.
1 2 3 4 5 6 7 8 9 | -(void)touchesBegan:(NSSet *)touches withEvent:(UIEvent *)event { /* Called when a touch begins */ if( _moving.speed > 0 ) { _bird.physicsBody.velocity = CGVectorMake(0, 0); [_bird.physicsBody applyImpulse:CGVectorMake(0, 4)]; } else if( _canRestart ) { [self resetScene]; }} |
But wait, where’s that resetScene method coming from? Right, we still need to implement it.
How would we do that? We can easily reset the bird, restart the animation and reset the_canRestart flag, but how can we reset the pipes? Right now the existing pipes are direct children of the _moving container and we have no way to easily distinguish them from other nodes like the ground or skyline.
In order to easily access the pipes and remove them from the scene, we will restructure the scene hierarchy one more time: We will introduce another artificial parent node for all pipes, add this node to the existing _moving node and add all pipes to this new parent node.
The change is pretty straightforward. Once again a new ivar…
1 2 3 4 5 6 7 8 9 10 11 | @interface MyScene () <SKPhysicsContactDelegate> { SKSpriteNode* _bird; SKColor* _skyColor; SKTexture* _pipeTexture1; SKTexture* _pipeTexture2; SKAction* _movePipesAndRemove; SKNode* _moving; SKNode* _pipes; BOOL _canRestart;}@end |
…and a new SKNode as the parent for the pipes…
1 2 3 4 5 6 7 8 | _moving = [SKNode node];[self addChild:_moving];_pipes = [SKNode node];[_moving addChild:_pipes]; SKTexture* birdTexture1 = [SKTexture textureWithImageNamed:@"Bird1"];birdTexture1.filteringMode = SKTextureFilteringNearest; |
…and all created pipes added to this node instead of the _moving node.
1 2 3 4 | [pipePair runAction:_movePipesAndRemove]; [_pipes addChild:pipePair];} |
Now we have everything we need to implement the resetScene method:
1 2 3 4 5 6 7 8 9 10 11 12 13 14 | -(void)resetScene { // Move bird to original position and reset velocity _bird.position = CGPointMake(self.frame.size.width / 4, CGRectGetMidY(self.frame)); _bird.physicsBody.velocity = CGVectorMake( 0, 0 ); // Remove all existing pipes [_pipes removeAllChildren]; // Reset _canRestart _canRestart = NO; // Restart animation _moving.speed = 1;} |
A little more drama
Right now, a crashed bird would simply fall as far as the physics world permits. If it crashes right in a pipe gap, it would possibly land directly on the lower pipe. I thought a little more drama was due! I wanted to ensure that the bird falls down to the ground and I wanted it to look a little more spectacular. So I changed the bird’s collision bitmask after collision so that it only would collide with the ground, and I added a little rotation animation:
1 2 3 4 5 6 7 8 | - (void)didBeginContact:(SKPhysicsContact *)contact { _moving.speed = 0; _bird.physicsBody.collisionBitMask = worldCategory; [_bird runAction:[SKAction rotateByAngle:M_PI * _bird.position.y * 0.01 duration:_bird.position.y * 0.003] completion:^{ _bird.speed = 0; }]; |
The angle and duration calculations are attempts to adjust the amount of rotation to the bird’s altitude. If the bird collides at a very low position, it will hit the ground sooner than if it collides at a high position, so the angle and durations are smaller if the bird flew lower. Right after the animation we change the bird’s speed to 0, too, to halt the wing flap animation. To avoid overriding the animation, we need to restrict the velocity-dependent rotation to when the game is still running:
1 2 3 4 5 6 | -(void)update:(CFTimeInterval)currentTime { /* Called before each frame is rendered */ if( _moving.speed > 0 ) { _bird.zRotation = clamp( -1, 0.5, _bird.physicsBody.velocity.dy * ( _bird.physicsBody.velocity.dy < 0 ? 0.003 : 0.001 ) ); }} |
Now we need to reset the collisionBitMask, speed and zRotation properties in the resetScene method as well:
1 2 3 4 5 6 7 | -(void)resetScene { // Reset bird properties _bird.position = CGPointMake(self.frame.size.width / 4, CGRectGetMidY(self.frame)); _bird.physicsBody.velocity = CGVectorMake( 0, 0 ); _bird.physicsBody.collisionBitMask = worldCategory | pipeCategory; _bird.speed = 1.0; _bird.zRotation = 0.0; |
An idea to make the crash even more spectacular would be to add a little feather particle system. But maybe that’s something for another tutorial.
Score counting
The first thing to do for score counting is to actually display the score. SpriteKit providesSKLabelNodes, which are meant to display text in the scene. iOS 7 comes with plenty of fonts to choose from, I decided to go for “MarkerFelt-Wide”. Eventually we should switch to a more fitting bitmap font, but this should do for now.
To keep track of the score and the label, we’ll first add two new ivars.
1 2 3 4 5 6 7 8 9 10 11 12 13 | @interface MyScene () <SKPhysicsContactDelegate> { SKSpriteNode* _bird; SKColor* _skyColor; SKTexture* _pipeTexture1; SKTexture* _pipeTexture2; SKAction* _movePipesAndRemove; SKNode* _moving; SKNode* _pipes; BOOL _canRestart; SKLabelNode* _scoreLabelNode; NSInteger _score;}@end |
Now we’ll initialize the ivars and add the label to the scene. Add this at the end of the /* Setup your scene here */ block.
1 2 3 4 5 6 7 | // Initialize label and create a label which holds the score_score = 0;_scoreLabelNode = [SKLabelNode labelNodeWithFontNamed:@"MarkerFelt-Wide"];_scoreLabelNode.position = CGPointMake( CGRectGetMidX( self.frame ), 3 * self.frame.size.height / 4 );_scoreLabelNode.zPosition = 100;_scoreLabelNode.text = [NSString stringWithFormat:@"%d", _score];[self addChild:_scoreLabelNode]; |
The score should increment whenever the bird has passed a pair of pipes. The easy way, as suggested in the comments, would be to simply increment the score when the pipes have left the screen and are removed from the scene graph. However, this would also mean a little delay until the score is counted. Instead, we will create an SKNode right “after” (meaning: to the right of) the pipes with a physics body with contact detection enabled.
Add this to -(void)spawnPipes:
1 2 3 4 5 6 7 8 9 | [pipePair addChild:pipe2]; SKNode* contactNode = [SKNode node];contactNode.position = CGPointMake( pipe1.size.width + _bird.size.width / 2, CGRectGetMidY( self.frame ) );contactNode.physicsBody = [SKPhysicsBody bodyWithRectangleOfSize:CGSizeMake( pipe2.size.width, self.frame.size.height )];contactNode.physicsBody.dynamic = NO;[pipePair addChild:contactNode];[pipePair runAction:_movePipesAndRemove]; |
If you run the game now, you’ll see that the bird crashes shortly after passing a pair of pipes. This happens because the contact of the bird’s physics body with the contactNode’s physics body is detected and - (void)didBeginContact:(SKPhysicsContact*) is called, but we currently do not distinguish whether the bird is in contact with the world or something else. We can make use of the collision categories again and add a dedicated one for the score area.
1 2 3 4 5 6 7 8 | @implementation MyScenestatic const uint32_t birdCategory = 1 << 0;static const uint32_t worldCategory = 1 << 1;static const uint32_t pipeCategory = 1 << 2;static const uint32_t scoreCategory = 1 << 3;static NSInteger const kVerticalPipeGap = 100; |
We assign this category to the score node that we created right before.
1 2 3 4 5 6 7 | SKNode* contactNode = [SKNode node];contactNode.position = CGPointMake( pipe1.size.width + _bird.size.width / 2, CGRectGetMidY( self.frame ) );contactNode.physicsBody = [SKPhysicsBody bodyWithRectangleOfSize:CGSizeMake(pipe2.size.width, self.frame.size.height)];contactNode.physicsBody.dynamic = NO;contactNode.physicsBody.categoryBitMask = scoreCategory;contactNode.physicsBody.contactTestBitMask = birdCategory;[pipePair addChild:contactNode]; |
Now we can handle the different types of contacts properly by investigating theSKPhysicsContact object passed to the didBeginContact method. It has two properties representing the two physics bodies in contact, bodyA and bodyB. If either of these two physics bodies is of category scoreCategory, we can increase the score. In all other cases, the bird collides with the world.
1 2 3 4 5 6 7 8 9 10 11 12 13 14 | - (void)didBeginContact:(SKPhysicsContact *)contact { if( _moving.speed > 0 ) { if( ( contact.bodyA.categoryBitMask & scoreCategory ) == scoreCategory || ( contact.bodyB.categoryBitMask & scoreCategory ) == scoreCategory ) { // Bird has contact with score entity _score++; _scoreLabelNode.text = [NSString stringWithFormat:@"%d", _score]; } else { // Bird has collided with world ... } }} |
The only thing left is to reset the score to 0 in the reset method.
1 2 3 4 5 6 7 | -(void)resetScene { ... // Reset score _score = 0; _scoreLabelNode.text = [NSString stringWithFormat:@"%d", _score];} |
The result should look like that:
The score update is a little boring. You can easily add some visual feedback by using someSKActions to scale the score for a short moment.
1 2 3 4 5 6 7 8 9 10 11 12 | - (void)didBeginContact:(SKPhysicsContact *)contact { if( _moving.speed > 0 ) { if( ( contact.bodyA.categoryBitMask & scoreCategory ) == scoreCategory || ( contact.bodyB.categoryBitMask & scoreCategory ) == scoreCategory ) { // Bird has contact with score entity _score++; _scoreLabelNode.text = [NSString stringWithFormat:@"%d", _score]; // Add a little visual feedback for the score increment [_scoreLabelNode runAction:[SKAction sequence:@[[SKAction scaleTo:1.5 duration:0.1], [SKAction scaleTo:1.0 duration:0.1]]]]; } else { ... |
The action scales the score text up to 150% of its size of 1/10th of a second and then back to the original 100% in another 1/10th second.
Many roads lead to Rome
I need to emphasize that there are dozens of other possible ways to implement the game mechanics.
For example, the world movement and score counting could easily be done in the updatemethod. The movement could be implemented depending on the passed time since last frame and the counting could be implemented depending on the pipe’s horizontal position. Even collision detection is so trivial that you don’t need the physics engine for that. On the other hand, look how easy it was to implement the bird’s behavior!
You would also normally not load all sprites into separate files but use texture atlasses instead (i.e. as many sprites as possible on one texture) because texture switches are an expensive operation on the graphics card.
From a software engineering perspective there is also plenty of improvement potential, like moving the score update functionality into a dedicated method, or even a subclass ofSKLabelNode with dedicated increment/reset methods.
Conclusion
During the course of this tutorial, you’ve learned how to…
- create a SpriteKit project with Xcode
- load textures into
SKTexture - create sprites with
SKSpriteNode - create text with
SKLabelNode - use different animation speeds to create the illusion of depth
- use the
SKSpriteNode‘szPositionproperty to control rendering order - attach and configure physics bodies to nodes
- configure the physics world
- use
SKActionto animate sprites, move the game world and control game states - control game flow using the
SKNode.speedproperty - handle touches
- detect and distinguish contacts between entities
- structure the scene graph in a way that makes sense for the game world
If you think that something needs to be covered in more detail, feel free to leave a comment or contact me on Twitter (@digitalbreed). I will try to update the tutorial or respond to you directly.
If you liked this tutorial and you have some Bitcoins to spare, I would appreciate a tip at 1QByEN4aeEN1KKqikBFUGdgeg1ZCX6c1nr.
Download
I have pushed the tutorial code to GitHub.
'비즈니스 트렌드(BUSINESS Trend) > 모바일앱(App)' 카테고리의 다른 글
| iOS App JiveRun For Health, Workout, Fitness (0) | 2016.01.31 |
|---|---|
| Learn iOS Game Development By Example: 10 Projects to Get You Started (31) | 2015.11.01 |
| 10 Best Running Apps (62) | 2015.10.24 |
| Developer Behind “Flappy Bird,” The Impossible Game Blowing Up The App Store, Says He Just Got Lucky (0) | 2015.09.19 |
| Report: Google Play’s App Store And Developer Community Grew Faster Than Apple’s In 2014 (0) | 2015.01.14 |
@chse, @McGee, seems like you haven’t added the required graphic files to the project. Also check the casing (ground vs Ground).
firstly thanks for your reply.
After log through many kinds of possibilities, i found nothing.
i got lots of warnings tho. and there was one just about _score.
“Format specifies type “int” but the argument has type ‘NSInteger *’ (aka ‘int *’) ”
Then i checked my header file. I found that:
NSinteger *_score .
i just removed that * and warnings’ gone.
score is working normal.
can you explain that for me ?
what’s the difference between ‘*’ and ‘no *’. i thought i had to use * in any situation.
really curious about why I was getting 4.
and this * thing!
lol
i asked too many questions
thank you
Okay, that explains it! “NSInteger*” is a “pointer to an NSInteger”. A pointer is basically a location in memory and you need to use it only for class instances, not for primitive values. Messing around with pointers leads to crashes most of the time, but since you’re initializing it with 0 and then only increment it, it doesn’t hurt. Since you’re working on a 64 bit system, a pointer increment with ++ points to the next position in memory, which means moving the pointer 4 bytes. This explains your row of 0, 4, 8,…! Go get a C / Objective C tutorial and work through that, too ;-)
Hi Matt, Solved the highscore problem! Please do a title screen/page this w/e?
Ok.
I learnt a lot from this tut as my first project on ios.
what i have learnt:
1. fancy logical operators that i have never used before
“? :”
when i first saw this, that just looked intimidating. But i calm myself down later, and look it up. hey that was just a shortcut for “if” !
2. i think i know how to use sprit kit major functionality now
1) set texture for sprites (even set the filter incase of scaling issue)
2) control depth of objects by setting zposition
3) basic physics system
4) repeating pattern and movement for simple tiles (that movement trick just feels like screwing over game players )
……
most important:
x) adequate confidence to keep going
appreciate it!
I’ve got 2 Errors :
error: could not read data from ‘/Users/Luki/Desktop/how-to-build-a-game-like-flappy-bird-with-xcode-and-sprite-kit-master/FlappyBirdClone/FlappyBirdClone-Info.plist’: The file “FlappyBirdClone-Info.plist” couldn’t be opened because there is no such file.
Command /Applications/Xcode.app/Contents/Developer/Toolchains/XcodeDefault.xctoolchain/usr/bin/clang failed with exit code 1
pls help me :(
I need some help… When i start the game is there anyway i could make it so you have to hit start instead of it starting automatically? Thanks if you can help!!
Luki redownload the zip file sounds like you deleted an important file
Nice tutorial, you may add as a scene change or level once you reach the end of a level no ..
Hello can i make the game faster ? and how about a start menu and a end menu with high score thanks
A start menu and an end menu would be great!! Thanks!!
anybody know how to add a start and game over menu if so please comment i have no idea how to thanks!!
I have 6 Error ,Error is Local declaration of ‘ _pipeTexture1′ hides instance variable’ in // Create pipes . every time i add the SKTexture* _pipeTexture1; and SKTexture* _pipeTexture2; its not work . i don’t Know why have Error. Please Help me.Thank you
Hey I was wondering if say a person was to put this game on the app store but with their own graphics added would that be ok or be copyright infringement
Mail from you:
“Hi Simon,
if you’re asking whether you can use the tutorial code to release your own app, no worries, you can do whatever you want with it. The art should be replaced, though.
And just mind you that the tutorial is far from a complete game, there are lots of bits and pieces missing.
Best regards
Matt”
What do you meant with “And just mind you that the tutorial is far from a complete game, there are lots of bits and pieces missing.”?
Can it not be released on app store yet?
Is it not compatibility with iOS 7?
And can you please help me to add start menu and a end menu with high score.
Sorry for bad english (norwegian)
Thank you in advance!
How to take off the numbers of the corner right down ( fraps i think) and make bird faster
Hi Matt,
This is really helpful and great tutorial. I am kinda new to iOS game programming and have done little with the cocos2d but now loving the SpriteKit more than cocos2d.
Well, I have a quick question that I could not get in this tutorial. For creating the values like
static const uint32_t birdCategory = 1 << 0;
static const uint32_t worldCategory = 1 << 1;
static const uint32_t pipeCategory = 1 << 2;
why do we need to do 1 << 0, 1 << 1 and 1 << 2 ? and why do we need these variables?
Can not we just do like
static const uint32_t birdCategory = 1;
static const uint32_t worldCategory = 2;
static const uint32_t pipeCategory = 4;
May be I was missing something but could not get this part.
Thanks
Jeewan
hello does anyone know how to play a sound when the bird goes threw the pipe and when you click on the screen?
I sometimes experience that the bird stop flapping. Only static “flapping” with no animation. Anybody experience the same thing?
@chse:
1. Add #import in the MyScene.h
2. make sure you have sound like…hurt…score and flap flap…. or email me: geir-ove1970@getmail.no (for sound)
3. Insert (replace old part):
-(void)touchesBegan:(NSSet *)touches withEvent:(UIEvent *)event {
/* Called when a touch begins */
if( _moving.speed > 0 && _bird.position.y max ) {
return max;
} else if( value 0 ) {
_bird.zRotation = clamp( -1, 0.5, _bird.physicsBody.velocity.dy * ( _bird.physicsBody.velocity.dy 0 ) {
if( ( contact.bodyA.categoryBitMask & scoreCategory ) == scoreCategory || ( contact.bodyB.categoryBitMask & scoreCategory ) == scoreCategory ) {
// Bird has contact with score entity
_score+=10;
// Sound effect – Score
[self runAction:[SKAction playSoundFileNamed:@"score.wav" waitForCompletion:NO]];
_scoreLabelNode.text = [NSString stringWithFormat:@"%ld", (long)_score];
// Add a little visual feedback for the score increment
[_scoreLabelNode runAction:[SKAction sequence:@[[SKAction scaleTo:1.5 duration:0.1], [SKAction scaleTo:1.0 duration:0.1]]]];
} else {
// Bird has collided with world
_moving.speed = 0;
_bird.physicsBody.collisionBitMask = worldCategory;
[_bird runAction:[SKAction rotateByAngle:M_PI * _bird.position.y * 0.01 duration:_bird.position.y * 0.003] completion:^{
_bird.speed = 0;
}];
// Sound effect – Collision
[self runAction:[SKAction playSoundFileNamed:@"hurt.wav" waitForCompletion:NO]];
// Vibrate
AudioServicesPlayAlertSound(kSystemSoundID_Vibrate);
// Flash background if contact is detected
[self removeActionForKey:@"flash"];
[self runAction:[SKAction sequence:@[[SKAction repeatAction:[SKAction sequence:@[[SKAction runBlock:^{
self.backgroundColor = [SKColor whiteColor];
}], [SKAction waitForDuration:0.02], [SKAction runBlock:^{
self.backgroundColor = _skyColor;
}], [SKAction waitForDuration:0.02]]] count:6], [SKAction runBlock:^{
_canRestart = YES;
}]]] withKey:@”flash”];
}
}
}
@end
Sorry, step 1: #import
Check Out Flappys Flight on App Store
H I G H S C O R E
1) add to the @interface the next lines as shown below:
@interface
….
NSInteger _heighscore;
SKLabelNode* _heighscoreLabelNode;
2) then add in the section “-(id)initWithSize:(CGSize)size” the following lines as shown below:
-(id)initWithSize:(CGSize)size {
if (self = [super initWithSize:size]) {
…..
_heighscore = [[NSUserDefaults standardUserDefaults] integerForKey:@”HighScoreSave”];
_heighscoreLabelNode.text = [NSString stringWithFormat:@"BEST %li", (long)_heighscore];
also add:
_heighscoreLabelNode = [SKLabelNode labelNodeWithFontNamed:@"MarkerFelt-Wide"]; //Type of title
_heighscoreLabelNode.position = CGPointMake(self.size.width / 1.3, self.size.height/9.67); //location
_heighscoreLabelNode.zPosition = 100; //font location
[_heighscoreLabelNode setScale:0.8]; //size
_heighscoreLabelNode.text = [NSString stringWithFormat:@"BEST %li", (long)_heighscore]; //string
[self addChild:_heighscoreLabelNode]; //add highscore
3) add the next lines to the “-(void)resetScene” as shown below:
-(void)resetScene {
…..
_heighscore = [[NSUserDefaults standardUserDefaults] integerForKey:@”HighScoreSave”];
_heighscoreLabelNode.text = [NSString stringWithFormat:@"BEST %li", (long)_heighscore];
4) add the next lines to the “-(void)didBeginContact” as shown below:
- (void)didBeginContact:(SKPhysicsContact *)contact {
if (_score > _heighscore) {
[[NSUserDefaults standardUserDefaults] setInteger:_score forKey:@”HighScoreSave”];
}
_______D O N E__________ NOW YOU HAVE HIGHSCORE_____________
Can someone help me please in creation of “game interface sheet” which includes:
- pause/resume button
- sound on/off button
- reset score button
THANK YOU!
Pleease help someone in creation of:
-sounds on/off button
-pause/resume the game
-reset score
loydspace@gmail.com
Awesome tutorial…the only thing I notice is that you’re not using the typical best practices in creating different classes for the different aspects of the app, other than that, well done.
Hi Matt!
I am learning objective C from scratch and so far learnt how to write simple programs for Mac OSX. I just wanted to get some advice on what resources to use for learning iOS game development (like what books, guides etc) after I’ve learnt the language. Loved this tutorial by the way!
Thanks!
Hi Matt,
Great tutorial! I’m still learning objective C, too.
Please have a hint what I have to do to see the pipes in front of the ground. Is this possible?
I am very pleased to get an answer,
Stefan
Hi there,
for some reason when my game resets the bird no longer flaps. Have you any advice?
Thanks
@Stefan, the ordering of sprites is determined by two things: 1. the scene hierarchy (implicitly through the order of adding nodes to the same parent or explicitly through parent-/child-node-relations) and 2. the zPosition property of a
SKNode.In the tutorial, I explicitly set the
zPositionto -10 to ensure that the pipes appear behind the ground (due to 1., the implicit version). You can change this value to e.g. +10 and the pipes should appear in front of the ground.@Pure, the
SKActionanimation runs infinitely, so the only idea I have is that thespeedattribute of the_birdis not properly reset to 1.Thanks Matt,
I know you are a busy man. If you could kindly add a tut for adding a stargame/restart ame buttons for this it would be great. Alternatively just some code. I have tried so many different options and I am stuck.
Thanks in Advance!.
Btw all I did for the bird not flapping scenario was move the _bird.speed = xx in the //Bird Has collided with the world to above the [_bird runAction....... instead of below. like so:
_bird.speed = xx
[_bird runAction:[SKAction rotateByAngle:M_PI * _bird.position.y * 0.01 duration:_bird.position.y * 0.003] completion:^{
For bird flapping issue / speed issue, add
_bird.speed =1 into resetScene method
For bird flapping issue / speed issue, add
-(void)resetScene {
…
_bird.speed =1 into resetScene method
…
}
Now it’s time to figure out how to make a start game / quit / restart game options!
Just a suggestion maybe use a custom class for the bird and pipes…
EXCELLENT tutorial!
My first attempt at an app and to much success, thank you.
I just have one error that remains unsolved: the addition of the ‘if…else’ conditional statement for the score increment works great, but seems to have over-ridden ‘death-on-pipe-collision’. The score also increases with collisions with the pipes, meaning you can fly on despite hitting them. While this may be great for those who like it easy, I was kinda going for the ‘red-flashing-death-on-pipe-collision’ effect…
I have tried a few things, but alas, I am a total noob.
Any recommendations greatly appreciated.
Thanks again,
M.
@Mary, hard to say what’s wrong from the distance, I would suggest you take a look at the source code on GitHub and compare it to yours.
Hey Matt!
Thank you so much for the tutorial. I was wondering if maybe you or someone else could explain more in depth the logic behind the scrolling ground/sky code? Especially the for loop. I am just struggling to understand how you are going about doing it.
Thank you!
-Derek
Solved! :D
Had a couple of crazy code placements, all fixed now.
Guess I just needed someone to tell me to look twice ;)
Thanks again,
Mary.
Hi there,
Can anyone explain to me how the game restarts, in terms of the code used. I mean that you add a BOOL and then change the value to a YES when you collide, then if you click again then you run the [self resetScene]. But in resetScene function you remove all the pipes not but how do you create all the pipes again?
Could someone specially point the code that is creating all the pipes again after you collide?
I am new to sprite kit so any help would be great.
Thanks,
Tushar
I did the tutorial, and all works fine. Now I have the latest SpriteBuilder (1.3.1) and it crashes on build after publishing. Then I updated Cocos with SpriteBuilder and it won’t build. Any ideas as to why?
Hi! Good night thanks for all the help you post in your page!its just awesome!! Im making a game with your flappy basis, but i have 2 questions that i cant implement,how can i spawn pipes with the fisrt delay? I mean that i dont have to wait a little bit for the forst pipes to appear? And how can i set the bounds for the bird? Because when i touch the screen for the bird to flap too much it goes of the screen. THANKS A LOT BY THE WAY cheers from South America!! :) :)
Hi Matt! AWESOME tutorial.
I was wondering, and yes I checked EVERYTHING with the source code, but is the only file we modify the MyScene.m? Because when I checked the other files, they don’t seem to show anything when I build and run in the simulator. I am running Xcode 6,